
Suppose you’re a beginner or an experienced iOS user. In that case, there’s a good chance that you’re not taking advantage of all of the shortcuts available in iMovie. In this complete guide to iMovie shortcuts, we’ll cover everything from how to speed up your editing process to how to customize your keyboard shortcuts.
Professional video editing software, iMovie, allows you to customize your films to your heart’s content with the music and sound effects you choose.
You may utilize your keyboard in iMovie to help you with numerous chores. For your convenience, below are the keyboard shortcuts for some of the most frequently used tasks.
You may also access shortcuts using the iMovie window’s shortcuts menu, which provides a set of commands you can use in specific circumstances. Press the Control key while clicking on an object to bring up a shortcut menu.
What are iMovie Shortcuts, Precisely?
Shortcuts are links to a computer program. It is possible to create shortcuts to programs in any position on the computer, such as in a folder on the Start bar, Taskbar, or the desktop.
If you look at the bottom-left corner of the Windows icon, you’ll see a little arrow pointing down. The screenshot depicts a Windows shortcut that points to the Steam gaming shop.
Using A imovie shortcuts split clip makes it easier to get to certain parts of software or files. It’s easier to locate what you’re looking for on the desktop rather than scroll through the Start menu’s Programs list.
Open a file faster by using a shortcut instead than browsing through the computer’s directories.
All iMovie Shortcuts
There have been a lot of imovie shortcuts pdf on our site recently. As a result, I will share with you some iMovie keyboard shortcuts.
Using an imovie cheat sheet 2022 may make completing any task in any app on your Mac faster and easier. Then there’s iMovie, where there are many options—as many as you’ll recognize from this list and as many as you want.
Part 1: iMovie Mac Keyboard Shortcuts & Hotkeys
You may use these shortcuts and hotkeys in iMovie on your Mac to do everyday tasks. For an imovie undo shortcut, you may select a collection of hotkeys to focus on.
Manage Project
imovie shortcuts 2021 allows you to create new projects or erase old ones quickly.
- Start a new video project by pressing Command + N on your keyboard.
- To trash an object, use Command + Delete.
Navigate the iMovie Window
To go about in iMovie, Use the mouse or trackpad, and yet these keys are also useful. When you’re in the iMovie browser, you’ll be able to see several components.
- Media: Command + 1
- Audio: Command + 2
- Titles: Command + 3
- Maps, backgrounds: Command+4
- Sound effects: Command + 5
- Transitions: Command + 6
- List library: Shift+Command+1
- Go to the library view: 1
- Go to the projects view: 2
- Minimize: Command+M
Item Selection and Editing
These iMovie shortcuts make it simple to play or modify a chosen item.
- Select a clip: X
- Select a portion of a video: Hold R and drag
- Press Command + A to select all clips.
- Undo all chosen clips Command + Shift + A
- Remove the specified text or frame. Command + X
- Copy the text or frame: Command + C
- To paste selected text or frame: Command + / (slash)
- Command + Z to undo the last action
- Shift + Command + Z to redo your last action
Play and Control Your Movie
Using these shortcuts, you may play and control the playing of your movie or chosen objects.
- Play item: / (slash)
- Play the item from the beginning: \ (backslash)
- Play frame below played: Space bar
- Fullscreen: Shift+Command+F
- Exit Full Screen: Escape
- Advance 1 frame: right arrow
- Rewind 1 frame: left arrow
- Move to the following browser clip: backward arrow
- Start or go back in the timeline: an arrow pointing upward
- Loop playback: Command + L
Control the Audio
Please keep these shortcuts in mind when working with audio in iMovie.
- Turn on voice-over control: V
- Mute: Shift + Command + M
- Separate audio: Option + Command + B
Part 2: Wondershare Filmora, A Mac Alternative To iMovie
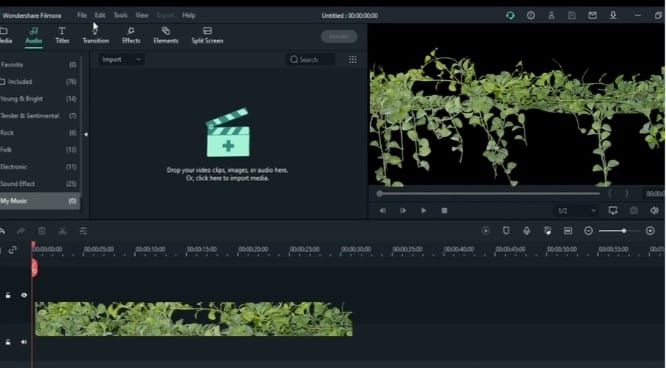
You may use IMovie for simple editing. Wondershare Filmora is the best option if you wish to add more complex features and effects to your films. This video editing program makes stunning videos in only three or four simple steps.
You may utilize Wondershare Filmora’s easy-to-use editing timeline, which contains up to 100 video tracks in the music library, to add a variety of special effects, transitions, and animated titles to your videos.
In Filmora, users may crop, enlarge/decrease the video size, or make them all fit simultaneously, depending on their preference. As an option, you can blur some areas of a video so that viewers focus on a specific object.
By turning or flipping, you may modify audio and visuals. You can also remove the video “noise.” Among the many features provided by Wondershare Filmora are several exclusive ones for Mac users, such as:
- Compatible with macOS Big Sur and Apple M1 chip
- Touch Bar support for MacBook Pro users
It’s time to spruce up your films using Wondershare Filmora, an innovative tool that lets you make a visually stunning and exciting video.
iMovie Window Navigation Shortcuts
Using the mouse or trackpad to navigate iMovie is straightforward, but these keyboard shortcuts are handy. You may see all of the iMovie browser’s components in this area:
- Media: Command + 1
- Audio: Command + 2
- Titles: Command + 3
- Maps and backgrounds: Command + 4
- Sound effects: Command + 5
- Transitions: Command + 6
Project-Manage
You may start a new project or delete an existing one with only a few keystrokes.
- Command+N to create a new movie
- Use the Trash can: Command + Delete.
Select And Edit Items
These hotkeys make it simple to choose an item and either play it or alter it.
- Select a clip: X
- Select part of a clip: Hold R and drag
- Select all clips: Command + A
- Unselect all the clips. Command + Shift + A
- Cut text or frame: Keyboard shortcut: Ctrl-x
- Copy text or frame: Command + C is this command’s shortcut.
- Paste the selected text or frame: Command + / (slash)
- Undo your last action: Command + Z
- Redo your last action: Shift + Command + Z
Movie Playback Controls
Controlling the playing of a movie or specific clips is easy with these shortcuts.
- Play the item: / (slash)
- Play the item from the beginning: \ (backslash)
- Play the below-played frame: Space bar
- Full-screen the item: Command + Shift + F
- Full screen: Escape
- Move the playhead forward one frame: Right arrow.
- Make use of the browser’s next-clip button: Down arrow.
- Start or skip the timeline: Up arrow.
- Loop playback: Command + L
Managing The Audio
iMovie’s audio hotkeys are an essential part of your workflow.
- Open voiceover: V
- Mute audio: Shift + Command + M
- Detach audio: Option + Command + B
iMovie on the Apple iPhone
It’s good to know that you can rapidly edit your video recordings on your iPhone or iPad to produce professional-looking home movies, whether from your summer vacation, footage of your kids, records of your grandparents, or any other celebration.
For the iPhone, Apple’s iMovie software has been there since 2010 as a Mac program. Simple to use, even for non-techies, the iMovie program makes it possible for anybody to produce stunning videos in a matter of minutes.
Now is the moment if you haven’t had a chance to try it out and unleash your inner Alfred Hitchcock.
Instructions For Installing iMovie
You may download the iMovie app on your iPhone or iPad from the Apple App Store. When downloading, ensure you have adequate storage space on your device and are connected to a Wi-Fi connection because the file size is slightly over 700MB.
The Method of using iMovie
A welcome page will greet you when you first launch iMovie, outlining how to use the program’s many features, such as clip selection, title creation, music drag-and-drop, and effect application. In the next section, we’ll show you how to perform all of them.
Apple’s software can also create trailers, which you can use to create a humorous homage to a special occasion or holiday. Because these are templated, selecting a few clips and letting the app do the heavy lifting for you is simple.
Because iMovie is available on iPhone, iPad, and Mac, you can keep editing your clips wherever you are. Your Projects screen will appear when you go beyond the first screen. The first step in creating your BAFTA-winning film is to go through the list of current projects and click on the “Create Project.”
Step #1: Create an iMovie Project
Click on the Create Project button to start a new one. You’ll have the option of creating a movie or a trailer. Pre-built templates are used in Trailers to allow you to input stills and videos.
The former is a blank canvas. We recommend beginning with Movie if you’re new to iMovie. You can tap on that area of the screen.
Step #2: Select iMovie Clips
A second page lets you browse your iPhone’s video and photo library by ‘Moments,’ which should make it easier to discover all of your vacation movies.
Select the clips and photographs you wish to utilize by tapping on them. Look to the bottom of the screen where the Create Movie button is located to see how many clips and how long your Movie would be.
Create a movie by selecting the clips and photographs you wish to include. It will arrange all of your clips in chronological order on the timeline. Adding transitions between clips will help them merge more easily.
You can scrub through the clips in your iMovie by swiping your finger over the timeline. Playing the Movie begins by swiping to the beginning and pressing the Play button.
Leaving it at that would be OK, but it’s often the case that your clips are a little too long, and you’ll end up pointing the phone at your feet before you’ve finished filming, which might ruin your masterpiece.
Step #3: Use iMovie To Make Final Edits To Your Footage
In iMovie, tap on a clip to begin editing. You’ll know you’re in editing mode as it will underline the clip in yellow. iMovie’s video editing tools include the following:
- Change the length of a clip or the start or stop point.
- Break up a lengthy video into many shorter ones
- Make a copy of a clip.
- Change the pace of a video clip
- Adjust the volume of a video clip.
- Make the transitions between the clips more dramatic and fluid
- Use music to set the mood for your videos.
Editing a clip’s duration is the first of several topics we’ll cover in greater depth later.
- iMovie: How To Make A Clip Shorter
Changing a video clip’s start or stop point is simple if you like the content but aren’t satisfied with the timing.
- To edit the length of a video clip, first, tap on the clip to outline it in yellow.
- Hold the thick yellow bar at the beginning of the clip and move it to the place where you want the clip to begin.
- Swipe back to where you want to terminate the clip, touch it again to make the yellow outline appear, then drag back to where you started.
- How To Break Up A Video Into Numerous Clips?
As a result, you may want to break up a long video piece so that you may add transitions and cut out parts you don’t like.
- Decide where in the video you want to split (marked with a white line).
- Then, select “Split.”
- First, you’ll see a box representing the “transition” that you may insert between your two clips (by default, there’s none; we’ll cover how to add them in a moment).
- Change the ‘new’ clip’s beginning and ending places, or Split it into other clips.
- How can you Perform Clip Duplication?
It’s possible to use the same clip many times or play it backward and forward simultaneously. Later, we’ll discuss how to reverse a video with iMovie. Duplicating a video clip is simple right now:
- Select Duplicate from the menu that appears when you tap on the clip.
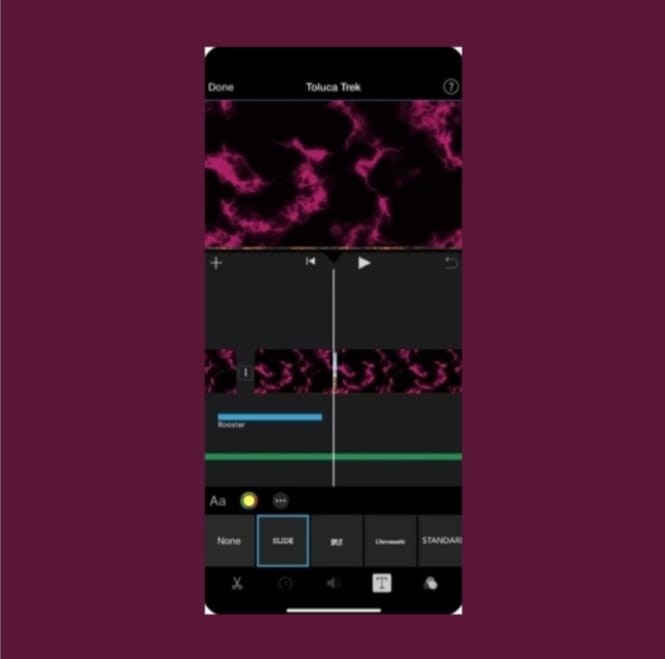
Step #4: Edit iMovie transitions
As a matter of course, Unless you instruct iMovie differently, it will insert a normal Dissolve transition between each of your clips. Nevertheless, there are several transitions at your disposal, such as:
- Theme
- Dissolve
- Side
- Wipe
- Fade
Step #5: Add iMovie Filters
Individual segments and your entire video may get a new look using filters similar to those seen on popular social media platforms like Instagram, Snapchat, and the Photos app. Other possibilities include:
- In either black and white or in color (B&W)
- Blast
- Blockbuster
- Blue
- Camo
- Dreamy
- Vintage
- Western
Step #6: Add Music
You may wish to add some music to your Movie’s soundtrack now that it’s in the final stages of production. You may use Apple’s music collection, or you can make your music with Garageband.
As a rule of thumb, we don’t recommend using any famous music because you’ll likely find yourself unable to post it on social media if you do so.
Step #7: Distribute Your Movie
After editing, Tap Done. You may watch the video and then share it with your friends by tapping the Share button. A job in Hollywood is in your future.
iMovie: How To Bring in Video Files?

Importing footage is the first step in making a film with iMovie. Select the files you want to import by clicking File, then Import Media. You can select multiple files by holding down the Command key or selecting them simultaneously.
It will import your files as soon as you choose Import Selected. My Media is where you may find them at any time. Once you’ve selected your primary footage, drag it onto the timeline using your mouse.
Now that you have a clip in the timeline, it’s a good idea to make changes to the project parameters before we begin editing. To accomplish this, click on the Settings option. In Settings, you’ll find the most common changes you’ll want to make:
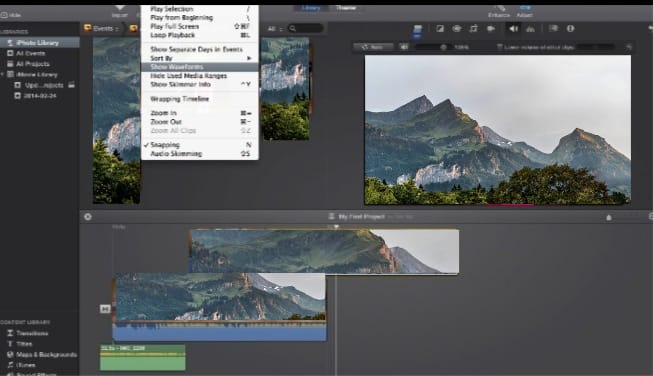
- The size of the clip
- Choose whether or not to display waveforms.
You may use the slide bar next to the Settings button to zoom in and out on your timeline. Use the following keyboard shortcuts instead:
- Command + to zoom in
- Command – to increase the magnification
It’s time to get into the nitty-gritty of how to edit films with iMovie.
How To Edit And Trim Video In iMovie?
Make your go to the beginning of your video to begin cutting it. Suppose you wish to cut out the opening ten seconds of the video. There are a few options here:
- Blade Tool: Click and hold Command B to delete a point. Once you have two clips, you’ll be ready. Press the Delete key on your keyboard to eliminate your chosen one.
- Handle: Use it to modify the clip length. Let go of it and start your video at that location.
Using the blade tool or handle, you may trim your video at the end if you want to. Besides the beginning and finish of your video, you may do this. You may use these tools at any time in your clip to eliminate any video that isn’t essential.
To begin, edit the video with a blade tool. Cut the film again, so you may remove the center area or do both. Alternatively, you may use the handle to trim the film you’ve already shot.
As a result, now that you know how to accomplish it, you can go through and eliminate any errors or unnecessary material. After editing, you want to have only the footage you want to utilize in your video.
You’ll have a bunch of small clips on your timeline. If you wish to rearrange them, click and drag the clip to the desired location in the timeline. Let’s bring in any other video or B-roll that you may have.
How to Include B-Roll Footage in an iMovie?
Including B-roll in your film is a cinch. Take clips from My Media and drop them onto your timeline. Drop it in part above your primary footage instead of next to your primary film, if possible.
Once the B-roll film gets dragged into place, it will begin playing instead of the primary footage. It’s possible to preview this in the playback pane.
You may adjust the clip’s duration by clicking and dragging the handles the same way as primary footage clips. You may also cut them using the blade tool. To move them around, drag them from one place to another.
At this point, you can include as much B-roll as you like in your video, but you should double-check the placement of each B-roll clip. Let’s finish off the video by adding any titles or visuals.
iMovie Titles and Text: How to Do It?
Select Titles from the main menu to see all available title settings. Each title choice previews in the playback window when your mouse is over it.
There are a variety of possibilities, from animated to static. Click and drop the title into the timeline once you’ve settled on one. For example, you may see it as a separate clip on the timeline.
Zooming in on the area where you put it may be necessary for any modifications. You may drag the handles to move it around and change its length, precisely like the other clips.
Double-click the title clip in your timeline to make changes to the text. You may then use the Text Editor to edit the text in the playback window. The font, size, color, and alignment are all customizable.
A place is a fantastic tool for creating more great titles for your work. It’s possible to make an excellent video intro in Placeit and then submit it to iMovie; for example, Drag the intro to your timeline, and that’s it.
How To Use iMovie’s Effects Plugin?
In the main menu, choose Transitions. Among the many transitions are Swipe Up, Circle Open, and Mosaic. The shift should be gradual, but don’t overdo it.
With a few of them, it’s a cinch to make your film look shoddy. Cross Dissolve, Fade To Black, and Fade To White are usually the sole effects we employ.
It’s as simple as clicking and dragging a transition into your timeline after you’ve made your choice. Drop it between two clips if you want it to work. Between each clip, you’ll notice a Transition symbol.
Using one of these preset transitions for a transition between two clips when both of you are talking is a bad idea. A zoom cut is a better alternative.
Moreover, many people are unsure of what a zoom cut is. In addition, it is possible to change the appearance of your images by zooming in on one of your photographs. A second, closer camera perspective appears, helping to break up your video.
How to Add Music to iMovie?
Slide back through time to the beginning of your life—Press Audio from the main menu. Music, Sound Effects, or GarageBand may already have some tracks you’ve imported.
If this is the case, you may import audio files into the My Media tab as you did when you imported video files. Import your music tracks by clicking File, then Import Media.
Drag and drop your track to the beginning of your timeline after you upload. It’s much easier to tell which audio files are whose when they arrive as green instead of blue clips.
You may drag your clip around, and you can adjust the start/end times can by dragging the handles precisely like the other clips. You’ll notice a small circle emerge after the video if you move your mouse over it.
The song will fade away till it stops if you click and drag this backward. So try doing this near the beginning of your video for a more subtle introduction.
To delete a section of audio, just cut it with the blade tool and make the necessary adjustments to your clip.
Check your video immediately and make any necessary adjustments to ensure that your video matches the audio perfectly. It’s a great moment to tweak your overall audio levels now that you’ve added Music.
How To Make iMovie’s Audio Sound Better?
The first step is to lower the level of your background music by hovering your cursor over the volume adjustment bar and dragging it to 0% so that you may make sure that the volume of your primary audio is set to the correct level before proceeding.
You should select the first primary footage clip. You may find the volume control bar by hovering over the clip again. If you raise the bar too much, some of the audio will reach the yellow, orange, and red portions.
You should never place your audio in the orange or red areas of the timeline.
Your goal is to find where loudness is as high as it can be without crossing into red or orange zones. It’s OK if it sometimes crosses the yellow line.
Your footage will probably not need more editing if it was shot all at once, at the same place, and with the same camera and microphone.
Of course, if some are noticeably louder than others, you may go through the process manually. The initial clip’s volume may be applied to all subsequent clips, saving you time.
Using Command C, pick the first clip and then copy it. After that, widen your view to see the rest of the clips. You may select them by clicking and dragging a box over them—select Volume from the Paste Adjustments drop-down menu in Edit.
It would help if you went through the whole video to ensure the audio doesn’t get into the orange or red regions once the volume levels have been applied to all segments. You may manually lower the volume adjustment bar for any required clips.
Add Audio Effects to iMovie Videos
A few audio effects are available for use with your video in iMovie. The noise-removal tool is quite beneficial. The small Audio icon in the top menu will appear when you’ve selected the clip you’d like to work on.
Reduce background noise by ticking the checkbox. It is also where you’ll find the Equalizer’s settings.
You may select from various equalizer settings by clicking the Equalizer drop-down box. Changing your audio is possible by selecting Voice Enhance, Bass Boost, Treble Reduce, and other options.
Further, adding audio filters may be done by clicking on the Filters icon in the upper menu. You may turn off audio Effects by clicking the “None” button. Audio effects, including Muffed, Echo Delay, Telephone, and Large Room, will display in a pop-up box.
It’s time to put back the background music after you fix the primary audio. You have complete control over the volume of your background music.
When it comes to background music in our videos, we often start around 20% to 30%. It is, nevertheless, essential to keep in mind that the volume of a particular audio track may differ from one another.
Listen to your video to see if the background music is too quiet or too loud and distracting once you’ve set the volume level. Adjust the values until you find a balance that works for you.
Summary of the iMovie Shortcuts and Tutorials
iMovie video editing tutorials are now complete. This iMovie guide for Mac includes all you need to know about iMovie editing, from the basics to the most cutting-edge techniques.
Check out the Primal Video Method now that you know how to utilize iMovie on Mac. Also, this handy guide explains everything you need to know about speeding up video editing.
FAQs
Q1: How can I organize my keyboard shortcuts?
A:
- To switch between keyboard shortcuts, tap one or more of these keys:
- Open the event summary and begin inputting parameters.
- Select Settings from the drop-down menu.
- To open the panel, use the keyboard shortcut in the sidebar.
- Select the operation by clicking on the appropriate row. You’ll see a pop-up window with the shortcut settings.
- You can press and hold the desired key combination to act or use Backspace or Esc to reset the action.
Q2: How Can I Separate An iMovie Clip?
A: After dragging the lengthy clip onto the timeline, position your player to where you wish it divided. Select the Split Clip option from the Modify menu.
- Can’t use the lens? Remove a section by slicing it in half and deleting it.
- Crop a clip: select it, hold down the R key, and choose the material you want to crop. Hold the Control key while clicking on the material to pick a trim option.
Q3: How To Undo iMovie Action?
A: To undo a previous action, click Edit > Undo or press Command-Z. iMovie shortcuts may save you a lot of time while creating an iMovie project.
With the iMovie trim shortcut, you may quickly reduce your video display time. You are now free to go wherever you choose!
iMovie Shortcuts Conclusion
Shortcuts may save you a lot of time if you’re well-versed in all of iMovie’s hotkeys. It is a quick and effective method for improving your iMovie skills. Ensure that you have the most recent version of iMovie installed.
That’s it from our side on our article “iMovie shortcuts” We hope this article was helpful to you. Stay tuned for more informative articles.