Have trouble with taking and deleting a screenshot on Mac? The Mac keyboard has shortcut keys that help in taking screenshots. However, to delete a screenshot, you need to perform various steps. Here, you will learn how to take, delete, edit, and relocate a screenshot on Mac.
Are you not happy with your screenshot application on Mac? Here, you will also find some alternate applications for Mac. Read the full article for more information.
It’s called a screenshot when you take a screen picture, and it can use for various purposes. We capture screenshots from time to time, either for reference or to help someone else understand what we’re trying to communicate.
However, if you keep doing so, your computer is accumulating a large number of unnecessary screenshots. As a result, you’ll need to remove them. Regarding Mac laptops, entry-level models typically have less storage space than their more expensive counterparts.
As a result, removing unnecessary screenshots is the best option. How to Delete Screenshots on a Mac is the subject of this article. Not only that, but we’ll go into further detail about it.
You can delete screenshots when your Mac clutches that you no longer need. If you want to clear up space on your computer, you should erase these screenshots. How can you delete screenshots on a MacBook Pro or a MacBook Air?
We’ll let you know that the process for doing so is the same for both laptops. So, let us get started:
Steps to Take Screenshots on Mac Using Shortcut Keys
As with Windows, you can complete taking a screenshot on a Mac is a simple process in seconds. Three keys are all that are required.
- Step #1: Find the picture you wish to take a screenshot of on the site.
- Step #2: Make sure the Screenshot is large enough for later inference.
- Step #3: The final step is to press SHIFT+COMMAND+3 to take a screenshot.
A little box displays on the bottom right of the page as soon as you snap a screenshot.
You may view these screenshots on the Desktop, making them simple to use. Specialized snapshot tools might help you save time when it comes to cropping a screenshot afterward. You can find these in recent Mac OS X releases such as Mojave and Catalina.
Keyboard Shortcuts For Mac
You can perform various actions and system tasks with hotkeys in macOS. When you use hotkeys, your work speed dramatically improves. You can capture a screenshot of your Mac screen by using the following Command:
- Take a screenshot of the entire Desktop by pressing Shift + Command + 3 on a Mac.
- The shortcuts Shift + Command + 4 and selecting an area with the mouse allow you to snap a screenshot of your Desktop screen.
- Take a screenshot of a specific window on the Desktop by pressing Shift + Command + 4 + Space. You may also use this keyboard shortcut to capture a website screenshot on your Mac.
Take a screenshot and then use the following hotkeys to copy it into a graphics or text editor of your choice:
- Save a screenshot of the entire Desktop to the Clipboard by pressing Shift + Command +3 + Control.
- Use Shift+Command+4+Control to save a screenshot of a specific region to the Clipboard.
- You can save the Clipboard screenshots by pressing Shift+Command+4+Space+Control+C.
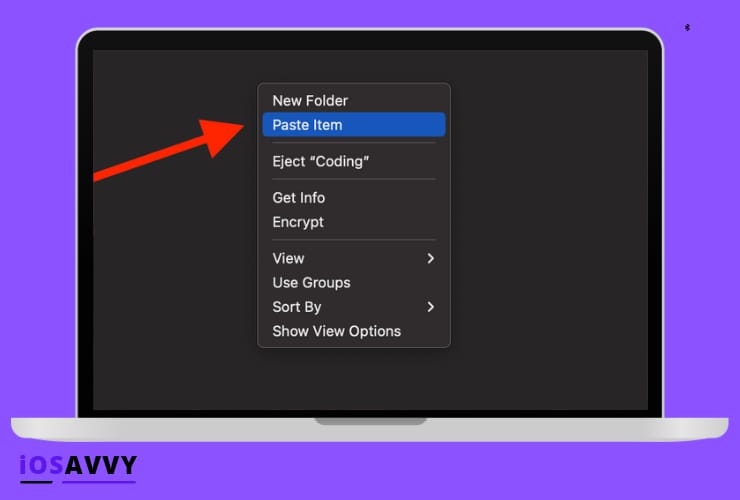
To paste the image, simply press Command + V. You can also use Menu Edit Paste to accomplish this.
How to Delete Screenshots on MacBook Air or MacBook Pro
Ideally, the Command and Erase keys on the keyboard can be used to delete any file, including a screenshot. Remember to choose the files before beginning this procedure.
You can erase the Screenshot stack/folder, any individual file, or a selection of multiple files by clicking with two fingers on it, then pressing Move to Bin. The final step is to empty the trash.
It’s possible for each Screenshot on Mac to use up a small amount of storage space on your computer. The more photos you take, the more memory you’ll need to save them. It can take a long time to go through all of the screenshots you’ve saved in various locations and erase them.
It is possible to simplify the process in such circumstances by using a Cleaner app. You may find all the screenshots at once with the Cleaner app. As a result, you won’t have to hunt for them yourself.
- Step #1: You can download the app from the App Store if you don’t already have it. Open the Cleaner app after installation.
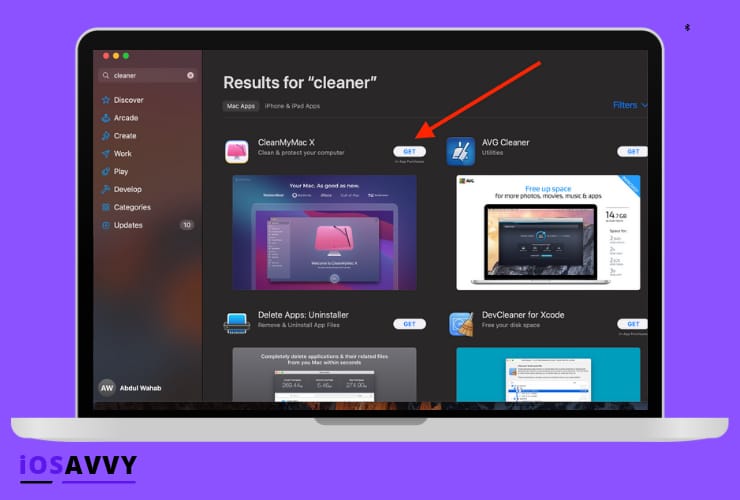
- Step #2: Click on the Screenshots section and pick All from the dropdown menu that appears.
- Step #3: Click the Review and Remove button in the process.
- Step #4: Decide which ones you’ll keep if necessary.
- Step #5: To remove all screenshots at once, click on the Remove button.
- Step #6: Take a look in the garbage and eliminate them.
Screenshot Your Entire Screen And Save It To Your Desktop
- Step #1: Press and hold the following keys simultaneously on your Mac keyboard: Add Command + Shift + 3 to your keyboard shortcuts. You will hear a camera shutter sound if the volume on your computer is loud. It indicates that you successfully captured a screenshot.
- Step #2: Take a look at the screenshots you’ve taken on your computer’s hard drive. You’ll find a file titled “Screen Shot 2014-12-19 at 2.45.29 PM” on your computer.
- Step #3: Inserting a screenshot into an article should be done with the article’s name in mind or a term you’re trying to incorporate into it. It facilitates the crawling and indexing of your article by Google.
- Step #4: Uploading a screenshot from your Desktop to a remote location is much like uploading any other image file.
Screenshot Of The Entire Screen And Save It To Your Clipboard
- Step #1: Hold down the following buttons on your Mac keyboard simultaneously: Command + Control + Shift + 3. You will hear a camera shutter sound if the volume on your computer is loud. It indicates that you successfully captured a screenshot.
- Step #2: Go to the location you want to use as a backdrop for your Screenshot. Any personal computer folder can be used anywhere, from an email to a presentation.
- Step #3: In the application where you want to paste your image, press Command + V simultaneously to copy and paste your image.
Take A Picture Of A Portion Of Your Screen And Save It To Your Desktop
- Step #1: While using a Mac, press and hold Command + Shift + 4 simultaneously.
- Step #2: The cursor will change to a crosshairs symbol. Then, using this cursor, select the region of your screen you want to capture with a screenshot. If you need to make a new selection, hit the “esc” key to start from the beginning again.
- Step #3: Let go of the mouse button when you’ve located the object you wish to save. Taking a screenshot will accompany the sound of a camera shutter if your computer’s volume is high.
- Step #4: Go to your Desktop and search for a file titled “Screen Shot 2012-12-17 at 3.24.37 PM.”
- Step #5: Inserting a screenshot into an article should be done with the article’s name in mind or a term you’re trying to incorporate into it. It facilitates the crawling and indexing of your article by Google.
- Step #6: To use your Screenshot offline, copy it to your Desktop and then transfer it to where you want it to use later.
Take A Screenshot Of Portion Of Your Screen And Save It To Your Clipboard
- Step #1: Hold down the following keys simultaneously on your Mac keyboard: Command + Control + Shift + 4.
- Step #2: A cursor will appear on your screen. If you want to take a picture of an entire region, click and drag your cursor to highlight it. Suppose you need to change your selection; press ESC to start over.
- Step #3: Navigate to where you want to place your picture. For instance, an email or a presentation could fit this description.
- Steps #4: You can paste an image into an application by holding down the following simultaneously: command-V
Take A Screenshot Using Grab
You can also take a screenshot with a little-known native Mac app called Grab, in addition to the keyboard shortcuts listed above. It works like this:
- Step #1: Search for “Grab” in the top-right search box of your Finder folder, which is accessible on your computer’s dock. Use the sidebar on the left to filter your search to include applications just.
- Step #2: Look at the Grab icon that pops up. When the app opens, pick “Capture” from the top navigation bar.
- Step #3: You can capture a screenshot of a selection, a window, a screen, or a timed screen by selecting the appropriate option from the dropdown menu.
Remove Screenshots From Mac Desktop Without Deleting?
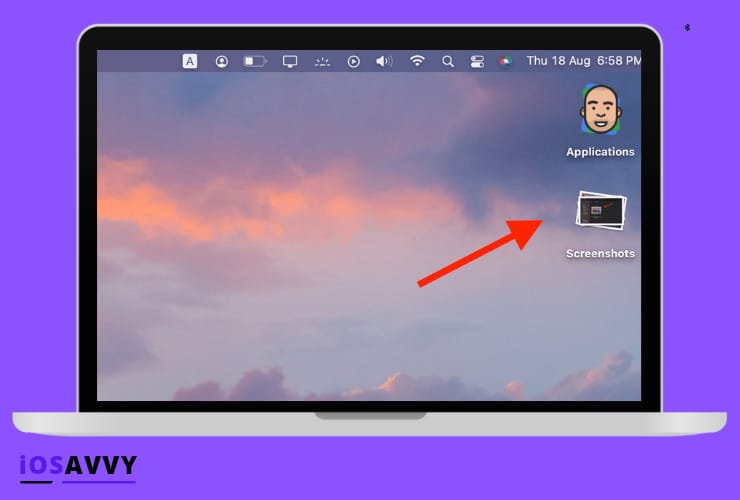
Taking screenshots with the keyboard shortcuts, command+shift+3 saves them on your Desktop, which can quickly get cluttered. To remedy this, create a folder titled screenshots and move all of your screenshots into it. You won’t lose them, but you can clean your Desktop instead.
What’s next? You’ll be retaking screenshots, which will appear on your Desktop this time. Copying and pasting them into the folder will be time-consuming. That’s what we’ll do next: We’ll simply modify the location of the screenshots saved in the screenshots folder. That’s why:
- Step #1: The first step is to create a folder on the Desktop called Screenshots, where you may save and view all of your screenshots.
- Step #2: To open a menu of choices, right-click on that folder.
- Step #3: Select Get Info.
- Step #4: In the new tab that appears, locate the “Where” information.
- Step #5: We will use the information you’ve copied into the Notes app on your phone.
- Step #6: Open the terminal app by pressing COMMAND+SPACE, typing terminal, and then pressing enter.
- Step #7: Enter the defaults and write com. apple—screen capture location in the new window after you click on this.
- Step #8: Copies of the “where” information can be found by going to your notes and opening them.
- Step #9: Afterwards, copy and paste the copied text into the code. [before pasting the route, make sure there is a space after the location]
- Step #10: After the code, type “/Screenshots” and press Enter to begin taking screenshots.
- Step #11: Enter “killall SystemUIServer” and press enter once again to ensure that the modifications you’ve made take effect.
Copy and paste any old screenshots from your Desktop into this folder immediately. New screenshots will be saved to that folder automatically because we only changed the storage location for the screenshots here.
Take Screen Pictures On A Mac With Screenshot
In previous versions of macOS, the Screenshot utility tool was the equivalent of Grab. Take screenshots of your Desktop screenshots, which you can also use to videotape yourself working on the computer.
You can search for this app using Spotlight or Launchpad or locate it in the Applications folder. Use the macOS Screenshot program to capture a screenshot of your Desktop:
Step #1: Use the Screenshot app on your phone or tablet to take a screenshot.
Step #2: The app’s toolbar will appear in the next few seconds.
Step #3: Take a screenshot by clicking on one of the three parts on the left:
- Click Capture or control-click to select Capture Entire Screen from the pop-up menu.
- The pointer appears like a camera and is used to choose the window you want to screenshot. You may either click Capture > or make a control click to take a screenshot. It’s also possible to grab a full-page screenshot of your browser window.
- It will capture the selected region, and you may move it by controlling clicking. You can also narrow or widen the area by dragging its edges. Finally, click Capture to finish the process.
How To Change Screenshot Location On A Mac
Taking a snapshot on a Mac may seem straightforward, but there are still a few nagging questions. Beginners don’t realize that the screenshots get stored on the Desktop rather than the pasteboard.
It is because that is the default save location. The fact that you may change the destination if your Mac desktop is getting too cluttered may surprise even the most expert users.
All screenshots are saved to your computer’s Desktop by default. Launch the Screenshot app and select the option to save screenshots to another location.
Here, you’ll find a list of places where you can save your content. These include Clipboard, Messages, and Other. Once you select a place, it will save all of your screenshots there.
Where Are Screenshots Saved?
You may change the location of your screenshots on your Mac by going to System Preferences > Images. You can also change the name of your screenshots by going to Settings > Screenshots.
This tool was added in macOS Mojave, allowing you to organize your Desktop so that all of your screenshots are in one place.
In the absence of macOS 10.14 Mojave or later, a screenshotting program named Grab will be available on your Mac. You could snap screenshots with Grab, which was in the utility section of the Applications folder.
If you don’t alter the name of the image, it will be saved as Untitled if you save it to your Documents folder.
Change Screenshot Location
When using macOS Mojave, Catalina, Big Sur, or Monterey, you can easily modify the location of screenshots.
- Step #1: Tap Command + Shift + 5 together.
- Step #2: Select Options from the dropdown menu.
- Step #3: Select a folder from the list or Other Location if you don’t see one.
- Step #4: You can create a folder if necessary or select a location from the dropdown menu.
- Step #5: Until you make another adjustment to the location, your screenshots will remain in that spot.
Along with your own defined ‘Other Location,’ you can select from the following: Desktop; Documents; Clipboard; Email; Messages; and Preview (if available).
Change Where Screenshots are saved In Older Macos Versions
Before Mojave, it wasn’t as simple to tell macOS to save screenshots elsewhere, such as in a folder labeled Screengrabs. For this example, we will assume that we have a desktop folder called just that, but you can adapt this method for different locations as long as you know the file path.
- Step #1: Open a new Finder window by clicking the Finder.
- Step #2: You can create a new folder using the Finder’s right-click context menu.
- Step #3: Now, open the Terminal app by pressing Command + Space and entering Terminal until the icon appears, then clicking on that icon to open the app.
- Step #4: Using the Terminal, type the following Command: You can set the locations for Apple Screen Capture. After location, there needs to be a space—not it’s going to operate without it.
- Step #5: This will automatically fill in the directory path if you simply drop your Screenshots folder on top of the Terminal window.
- Step #6: Now, hit the Enter key.
- Step #7: Make sure this change takes effect by typing the following: terminate the SystemUIServer process.
- Step #8: A word of caution: don’t remove the folder you created accidentally!
- Step #9: If you want to keep your screenshots accessible from the Desktop, you can use an alias. When you create a folder, locate it in the Finder and right-click it.
- Step #10: Create an Alias option.
- Step #11: Afterwards, simply drop the Alias on your Desktop.
- Step #12: Take a few screenshots to make sure everything is operating correctly.
After resetting the default location, type “defaults write” (without quotation marks) in the Terminal and hit Enter to return to the previous setting. Next, enter “killall SystemUIServer” (without quotation marks).
Save Screenshots To The Pasteboard
Windows PCs and Macs have a somewhat different approach when printing your screen. The pasteboard in Windows saves screenshots rather than the Desktop.
You must create a new document and a screenshot pasted into it. You can do this in Photoshop, Paint, or any other image-editing program of choice. You can change the keys you hold when taking a screenshot to mimic this functionality on a Mac if you so desire.
To move the crosshairs, hold down Ctrl while dragging the cursor across the required area with Command + Shift + 4. Instead of saving to the Desktop, the resulting Screenshot will get saved to the pasteboard so that you may paste it into Preview or a Keynote project, for example.
This method works on any Mac, regardless of whether it is running Mojave or a later version. To save a screenshot to your Mac’s pasteboard, follow these steps:
- Step #1: It’s a simple command-and-shift-four. You’ll see the crosshairs. Please let go of the keys.
- Step #2: Drag the crosshairs across the screen area you wish to capture by pressing Ctrl.
- Step #3: It’s time to let go of your mouse button.
- Step #4: Pasteboard will be used to save the Screenshot.
Editing Screenshots
Even though a computer screenshot may appear like a common feature, it has a wide range of applications. Despite their seeming simplicity, screenshots contain a grey area of unofficial ethics, particularly concerning social networking.
No matter why you want to use screenshots, it would help if you first mastered the technique. You’ll also need to learn how to edit screenshots on a Mac if you’re coming from a Windows computer.
Keep reading the rest of this article to learn how to take and edit screenshots on your Mac.
The Reasons for Capturing a Screenshot
Let’s talk about why people take screenshots before we understand how to do it on a Mac. A screenshot’s primary purpose is to capture various data types and save them as images. At the time, converting these materials to PNG, JPG, and other image formats was challenging.
People snap screenshots of charts, tables, and graphs for performance reports. You don’t have to be concerned about how a picture will look on your report when you use screenshots.
You can include screenshots as an attachment if you need to reduce the size of your emails by employing graphics. It allows the recipient to comprehend your message better.
You can use screenshots of your reference and add arrows and labels if you need to convey directions. As a result, the other party will better grasp what you are saying.
There isn’t an official Mac snipping app. However, you can still benefit from the same features by learning how to take and edit screenshots. Let’s look at the many methods for taking screenshots on your MacBook or Mac desktop and the post-capture editing options.
Creating a Screenshot Via Preview
First, you may use your Mac’s built-in Preview application. Press Shift + Command + 3 to capture a screenshot of the image or page you’re working on. Once you take the Screenshot, you can save it as a file on your Desktop.
You can use Shift + Command + 4 plus the space bar to take a screenshot of a single window. Click on the window you want to take a screenshot of to finish the process.
Select the region you want to save by pressing Shift + Command + 4 and dragging your cursor to the desired location.
To rotate the new image, look for the rectangle with a curved arrow at the top of Preview. That’s the button for rotating. Each time you press the button, your image will spin by 90 degrees.
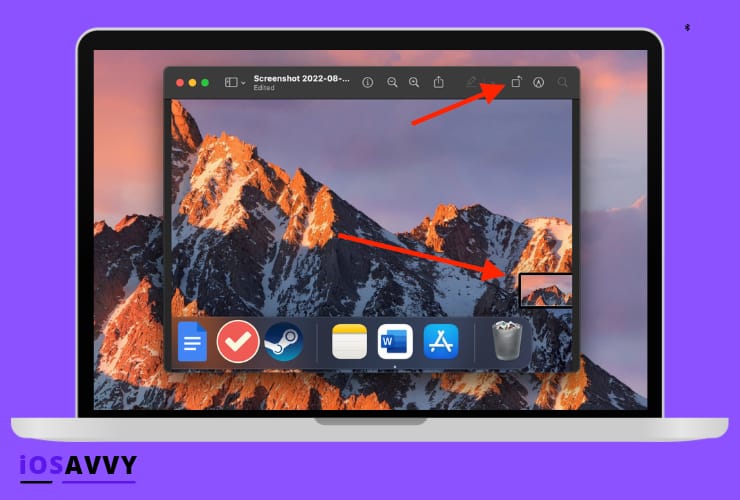
Select “Adjust Size” from the Tools menu to change the image size. With this feature, you may customize the Screenshot’s dimensions, including its width, height, and resolution.
To crop, select the “Crop” option in the Tools menu. Select “Adjust Color” on the Tools menu to change the hues.
Creating a Screenshot Via Grab
It’s possible to take screenshots on your Mac using Grab. As far as screenshots go, Grab isn’t as popular as Preview, but it does the job just fine.
Open the Finder folder from the dock of your Mac. Use the search box in the upper right corner of the window to look up “grab.” Select “Applications” from the left-sidebar menu.
Take a moment to open the Grab icon and wait for it to begin. “Capture” can be found in the “Top Navigation Bar.” A drop-down menu will allow you to choose the kind of window you want to capture.
Screenshots can be taken in four different ways: an entire screen, a selected area, a portion, or a window.
Creating a Screenshot Via TouchPad
You can also take screenshots with your TouchPad. On the other hand, it only applies to later MacBook Pro models.
The Touch Bar’s Screenshot icon can be enabled by clicking on it. There is an icon that looks like a camera that you will see. Select the desired screenshot type on the icon.
“Entire Screen,” “Selected,” “Portrait,” and “Window” screenshots are all available.
The Online Screen Reader
You’ll notice a few dynamics when you use your Mac’s built-in screenshot capability. You should edit your screenshots using the most effective tools at your disposal.
Editing screenshots with the Online Screen Reader is a cinch. The app can be downloaded and installed on your Mac. Select “Record with Online Screen Recorder.”
Press and hold the left button on your mouse to snap a screenshot. Use your mouse to create a circle around the screen area where you want to snap a screenshot. After you’ve captured the desired region, let go of the left button.
After you take a screenshot, you can alter it. You can also add arrows and underlines to your text. Also, you can change the colors or add frames of different shapes.
It is necessary to save your Screenshot first before you can use the Online Screen Recorder’s advanced functions. Save and can be done by clicking the three buttons on either side of the screen.
Afterward, you can crop the image to get the best possible view of it. In addition, you can resize it and apply brush strokes or other pictures. By selecting the “T” icon, you can add annotations to your Screenshot.
Best Apps For Taking Screenshots
macOS comes with a handy screenshot tool. As a general rule, it’s a good tool. However, there are instances when you’ll need more powerful features to get the screenshots you want on your Mac.
You may need to crop or annotate the Screenshot you just took before saving them. You may require a third-party screenshot application upgrade for this. Following are the best screenshot apps:
1. Skitch
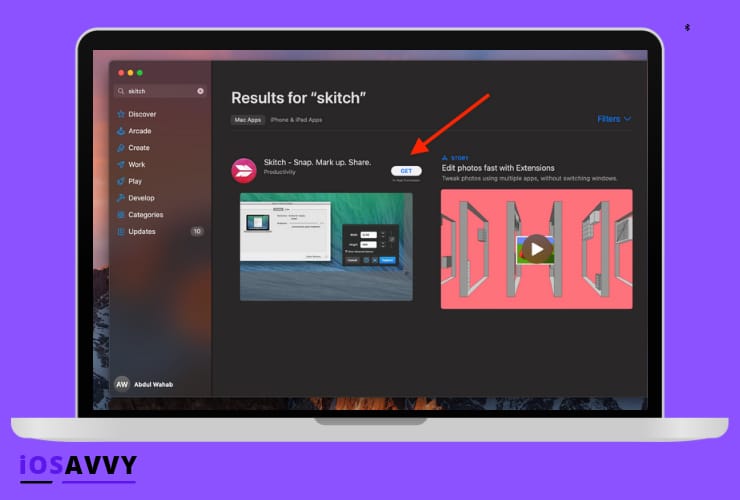
Taking screenshots on your Mac has never been easier than with Skitch, the most excellent third-party software. Developed by Evernote, it’s available for free download and use. Connecting the two is possible to get even more out of Evernote.
With Skitch’s handy annotation capabilities, taking screenshots and altering them has never been easier. Adding arrows, text, shapes, and markings is as simple as opening the program and using the tools on the left side. Cropping the Screenshot is also an option that’s available in this menu.
2. Shottr
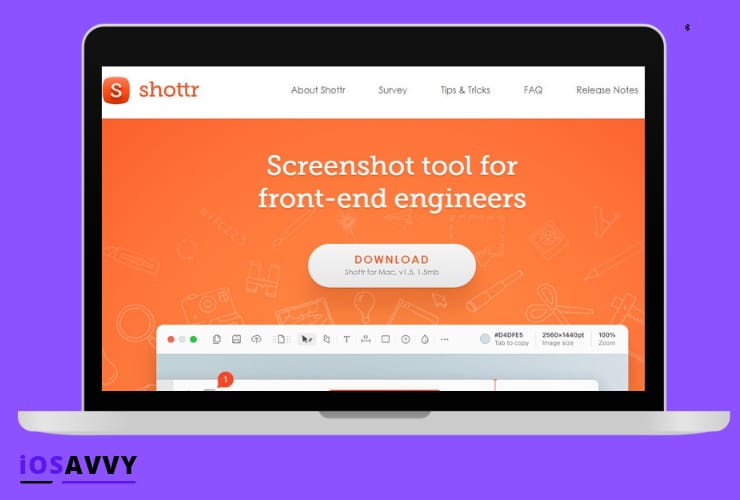
Shottr is a Mac software that takes extremely small screenshots. Users who cannot download software from the Mac App Store can use this app instead. In your menu bar, Shottr appears as an S icon. It has a slew of options when you first open it.
Our favorite screenshot software is at the top of the list since it has several capabilities usually only available for a fee. OCR (Optical Character Recognition) is one of the most common examples. Most other screenshot programs don’t offer these capabilities for free.
3. Snagit
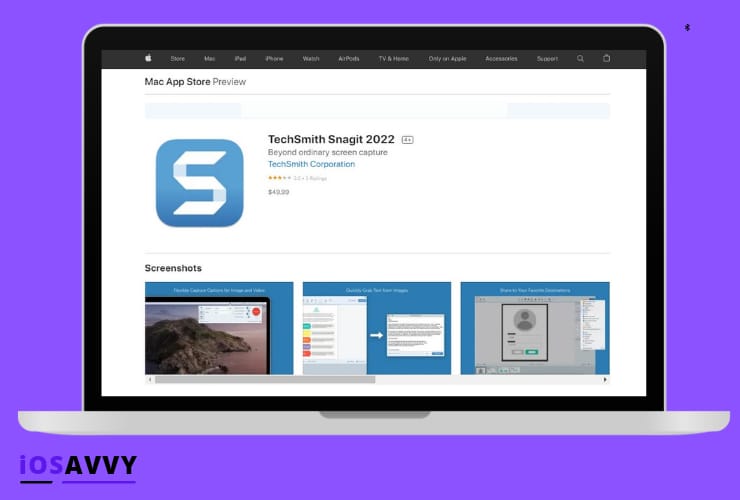
On a Mac, Snagit is the best-paid application for taking screenshots. This app has more extensive capabilities than most free apps, allowing for greater control over screenshots.
Snagit’s annotation tools let you make even the most basic screenshots uniquely yours. Changing the font, adding text details (such as shadows and colors), and adjusting the opacity of the text are all options. It’s a short version of Adobe Photoshop.
Snagit is backed by a 30-day money-back guarantee, despite its high price. It’s possible to get your money back if you decide you don’t need a tool after using it only once. In addition, there is a free trial period that you can use.
Snagit is the best option for those who need to use screenshots in more complex presentations. Take a look at Shottr, which is a more basic option.
4. Monosnap
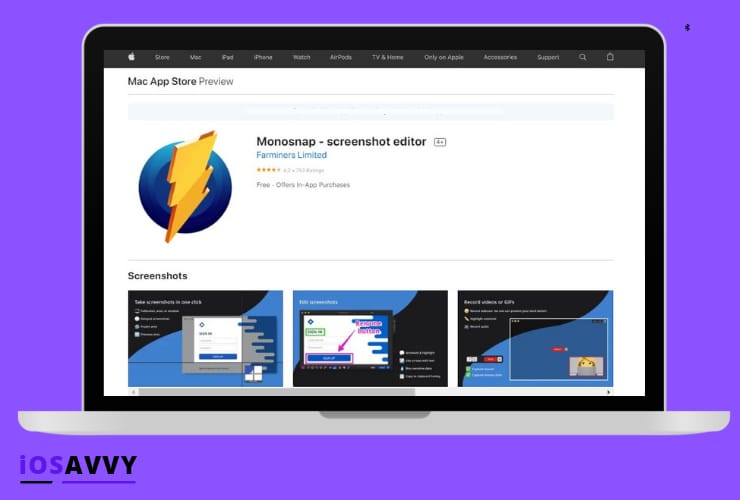
Another free Mac screenshot editor, Monosnap, may be downloaded from the App Store. Monosnap is similar to the other apps on this list in that it hides in the menu bar but is still accessible.
In the menu bar, select the Monosnap symbol to bring up the Capture Area, Fullscreen, and Record Video options. In addition, you can open any screenshot or image you want to alter using the Open option.
Monosnap lets you create shortcuts for commonly used features to make screenshotting even faster and easier. Change the preferences in the menu bar by selecting the Monosnap symbol > Preferences.
Monosnap’s subscription edition provides longer recordings, more cloud storage space, and third-party integrations, even though the free version is sufficient for most customers. The commercial edition is only worth upgrading if you’ll be doing a lot of professional work.
5. LightShot
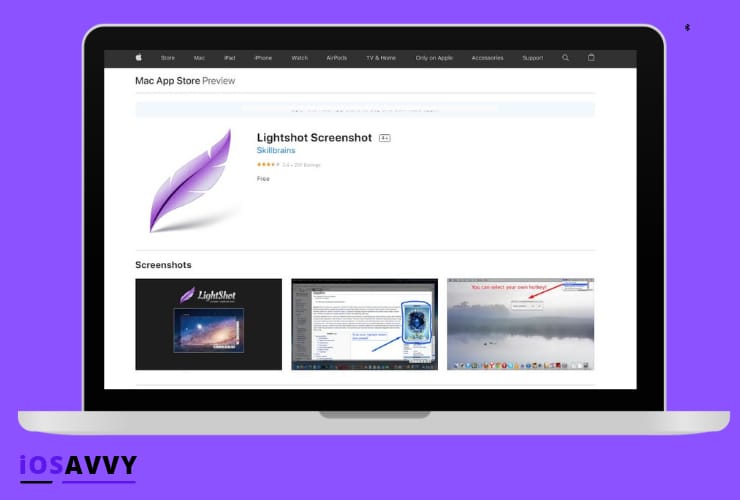
You can download Lightshot from the Mac App Store for free. Using this program, you may snap and annotate screenshots with ease. A little like Skitch, but with some subtle differences in operation
You’ll notice a feather icon in the menu bar after the program has been opened and is ready for use. Take a screenshot by clicking on the feather icon or pressing Cmd + Shift + 9 on your keyboard.
Your screen will noticeably dim regardless of the method used to activate screenshot mode. Select the area you wish to take a screenshot of by clicking, holding, and dragging. It will display a couple of menus with various screenshot options.
You can add text, arrows, shapes, and lines to your Screenshot using the tools in the right-side menu. You can also customize annotation in terms of hue. In the bottom horizontal menu, you can cancel the snapshot or save, copy, print, share, or upload the Screenshot to cloud storage.
When you click save on Lightshot, it prompts you for the Screenshot’s final destination. To keep your Desktop free of clutter, this is a valuable tool.
6. Droplr
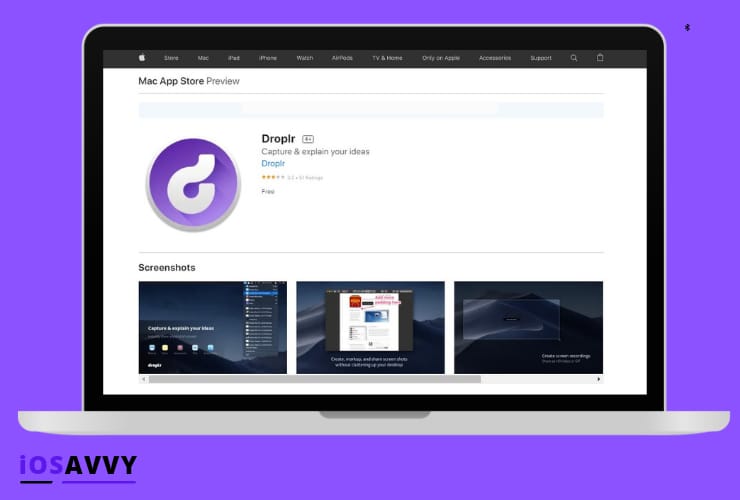
You may use Droplr to take screenshots and record Mac screens. For a limited time, you may take advantage of a three-day free trial to explore what it can achieve. It’s simple to use, and you have the choice of taking a screenshot of the entire screen or just a portion of it.
GIF and HD video recording, both in full-screen and partial-screen capture modes, are two choices for recording the screen. For a more personal touch, you can even add your webcam feed.
Once you’ve captured or recorded a screenshot or video, you can use Droplr’s built-in editor to edit and annotate your content.
Afterward, you can instantly save your screenshots or screen recordings to your Droplr cloud account, from where you may save them to your device locally or share them with others via email or Slack.
7. Markup Hero

With Markup Hero, you can annotate screenshots on your Mac. Most of the advanced features are available for free. However, there are a few that aren’t.
Using this software, you’ll be able to quickly and easily create, edit, and share notes with others. Use the Chrome extension to take scrolling screenshots of any tab at any time, if necessary.
It’s impossible to communicate your ideas effectively without the use of annotated text. Regarding screenshot editing, Markup Hero has you covered with all the tools you’ll need to get the job done right.
Additional options include changing the color of an annotation or flipping or rotating an image. Additional pages or content cropping is always an option, of course.
Lastly, Markup Hero adds integration compatibility for nearly all of the widely used tools on the market. Then without switching between apps or browser tabs, you can annotate your Google Docs, Sheets, and Slides documents in your Google Drive account.
You can use the annotation API in Markup Hero in your web application to give markup and annotation functionality in addition to Google’s app suite.
Conclusion
You’ve got this! With the information you’ve just gained, you should be able to take screenshots on your Mac with ease. Deleting is simple, but retaining them is impossible.
It is best to remove them from the Desktop rather than eliminate them. Nevertheless, we’ve outlined all the stages for both processes and the best screenshot apps so you can choose which one you prefer.
Here we conclude our article “how to take and delete a screenshot on Mac.” For more informative articles, stay tuned!